Previous blog/Context:
In an earlier blog, we discussed Spark ETL with SQL Databases (MySQL and PostgreSQL Database). Please find below blog post for more details.
Introduction:
In this blog, we will discuss Spark ETL with NoSQL database, and we are considering MongoDB and we will do all the Spark ETL with MongoDB database. All other NoSQL databases like Cassandra, Azure cosmos DB, Amazon DynamoDB and others, they all follow same pattern for doing Spark ETL as MongoDB. (Only difference is we need to use specific spark package for each database)

Today, we will perform below Spark ETL operations
- Install required spark libraries
- Create connection with MongoDB
- Read data from MongoDB
- Transform data
- write data into MongoDB
First clone below GitHub repo, where we have all the required sample files and solution
https://github.com/developershomes/SparkETL/tree/main/Chapter2
If you don’t have setup for Spark instance and MongoDB in your system follow earlier blog for setting up Data Engineering tools in your system. (Data Engineering suite will setup Spark, MySQL, PostgreSQL and MongoDB in your system)
Spark ETL with NoSQL Database
First open Jupyter Notebook and copy all the content of Chapter2 from GitHub to there.
As you know, we don’t have MongoDB spark package available with our existing Spark setup. So, we also need to download and install MongoDB Spark package.
We can check all the available version for MongoDB spark package from below Maven page
https://mvnrepository.com/artifact/org.mongodb.spark/mongo-spark-connector

so, if we join groupid:artifactid:version
It will be as below
'spark.jars.packages' : 'org.mongodb.spark:mongo-spark-connector_2.12:3.0.1'MongoDB Setup and load data for Spark ETL
AS part of Data Engineering suite, we have set up MongoDB also. From Spark we will read and write data to MongoDB. We can use files from GitHub and Import into MongoDB so that we have collection ready in MongoDB which we can read from Spark.
Open Mongo Compass and connect local MongoDB instance, click on create database

Pass database name as ‘dataengineeing’ and collection name as ’employee’ . Open collection and click on import, select employee.csv file from GitHub repo.
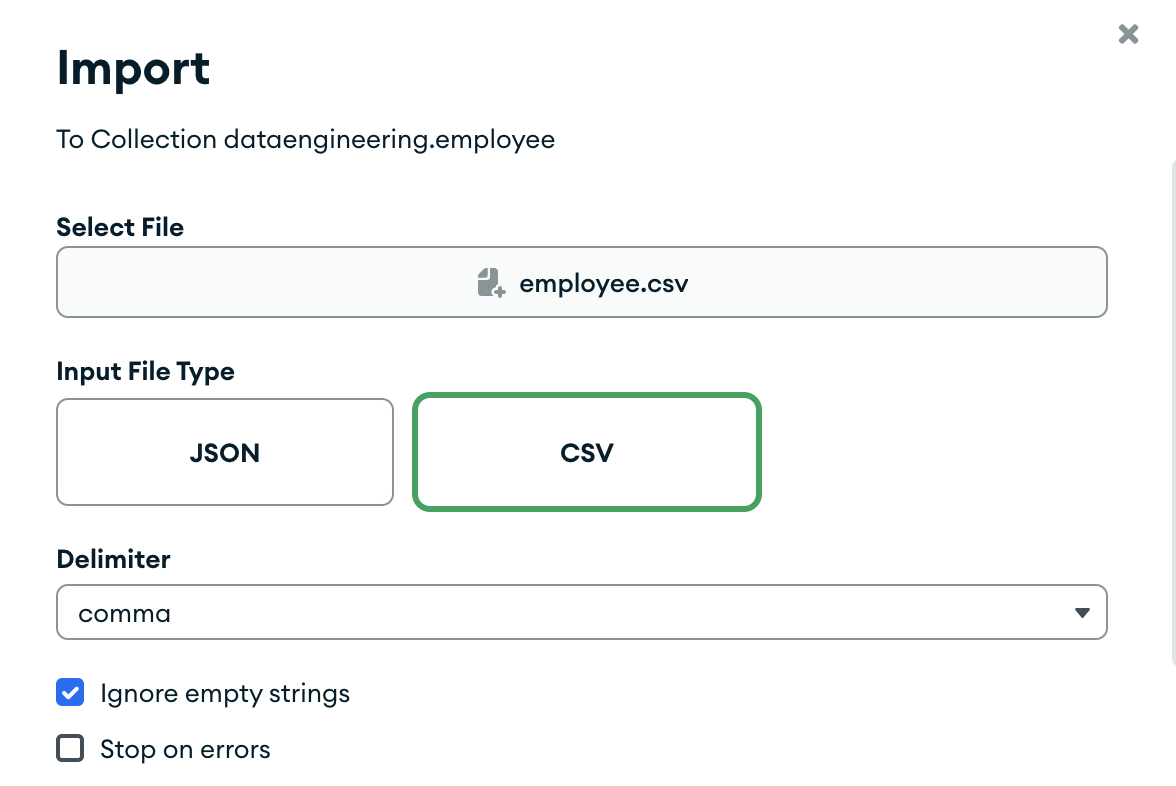
Check all the columns and click on import
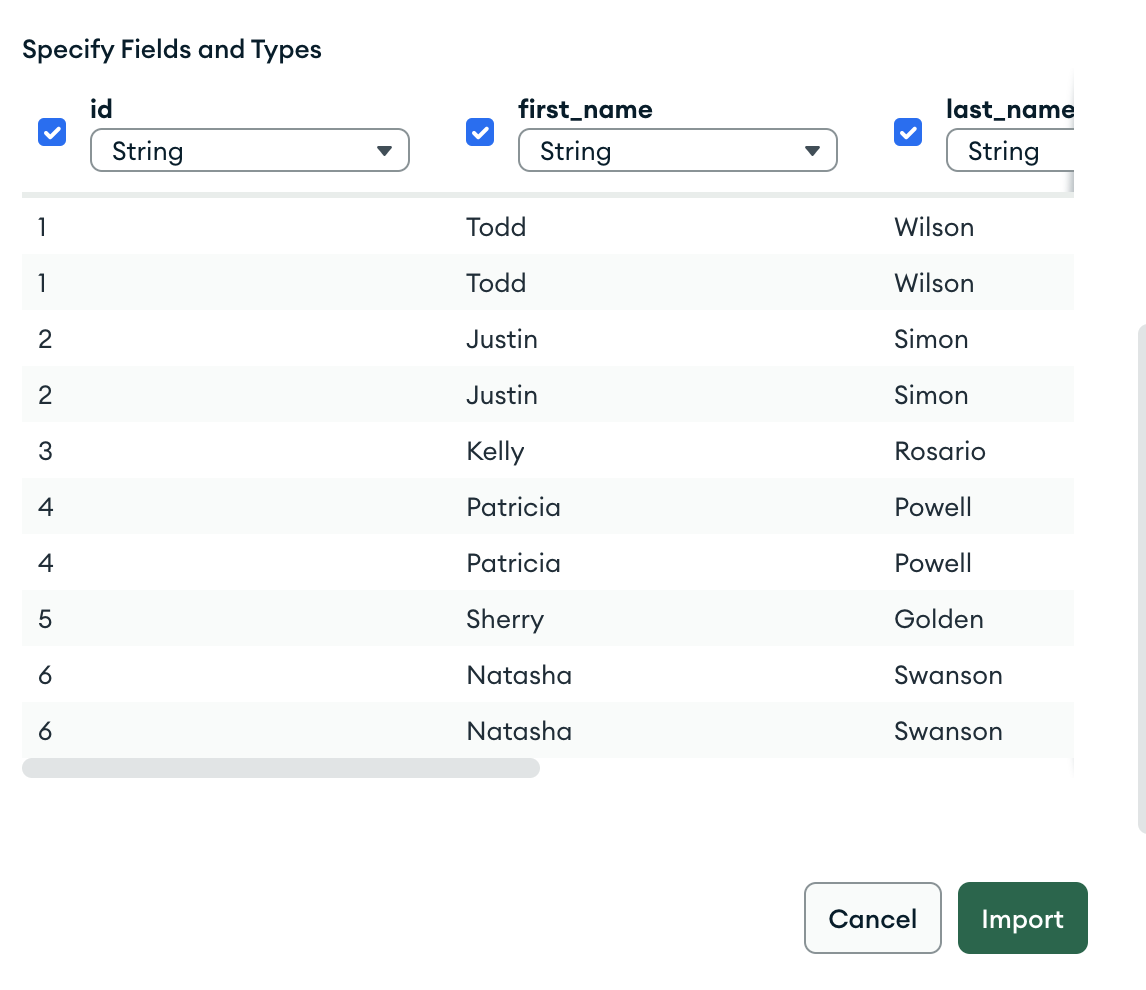
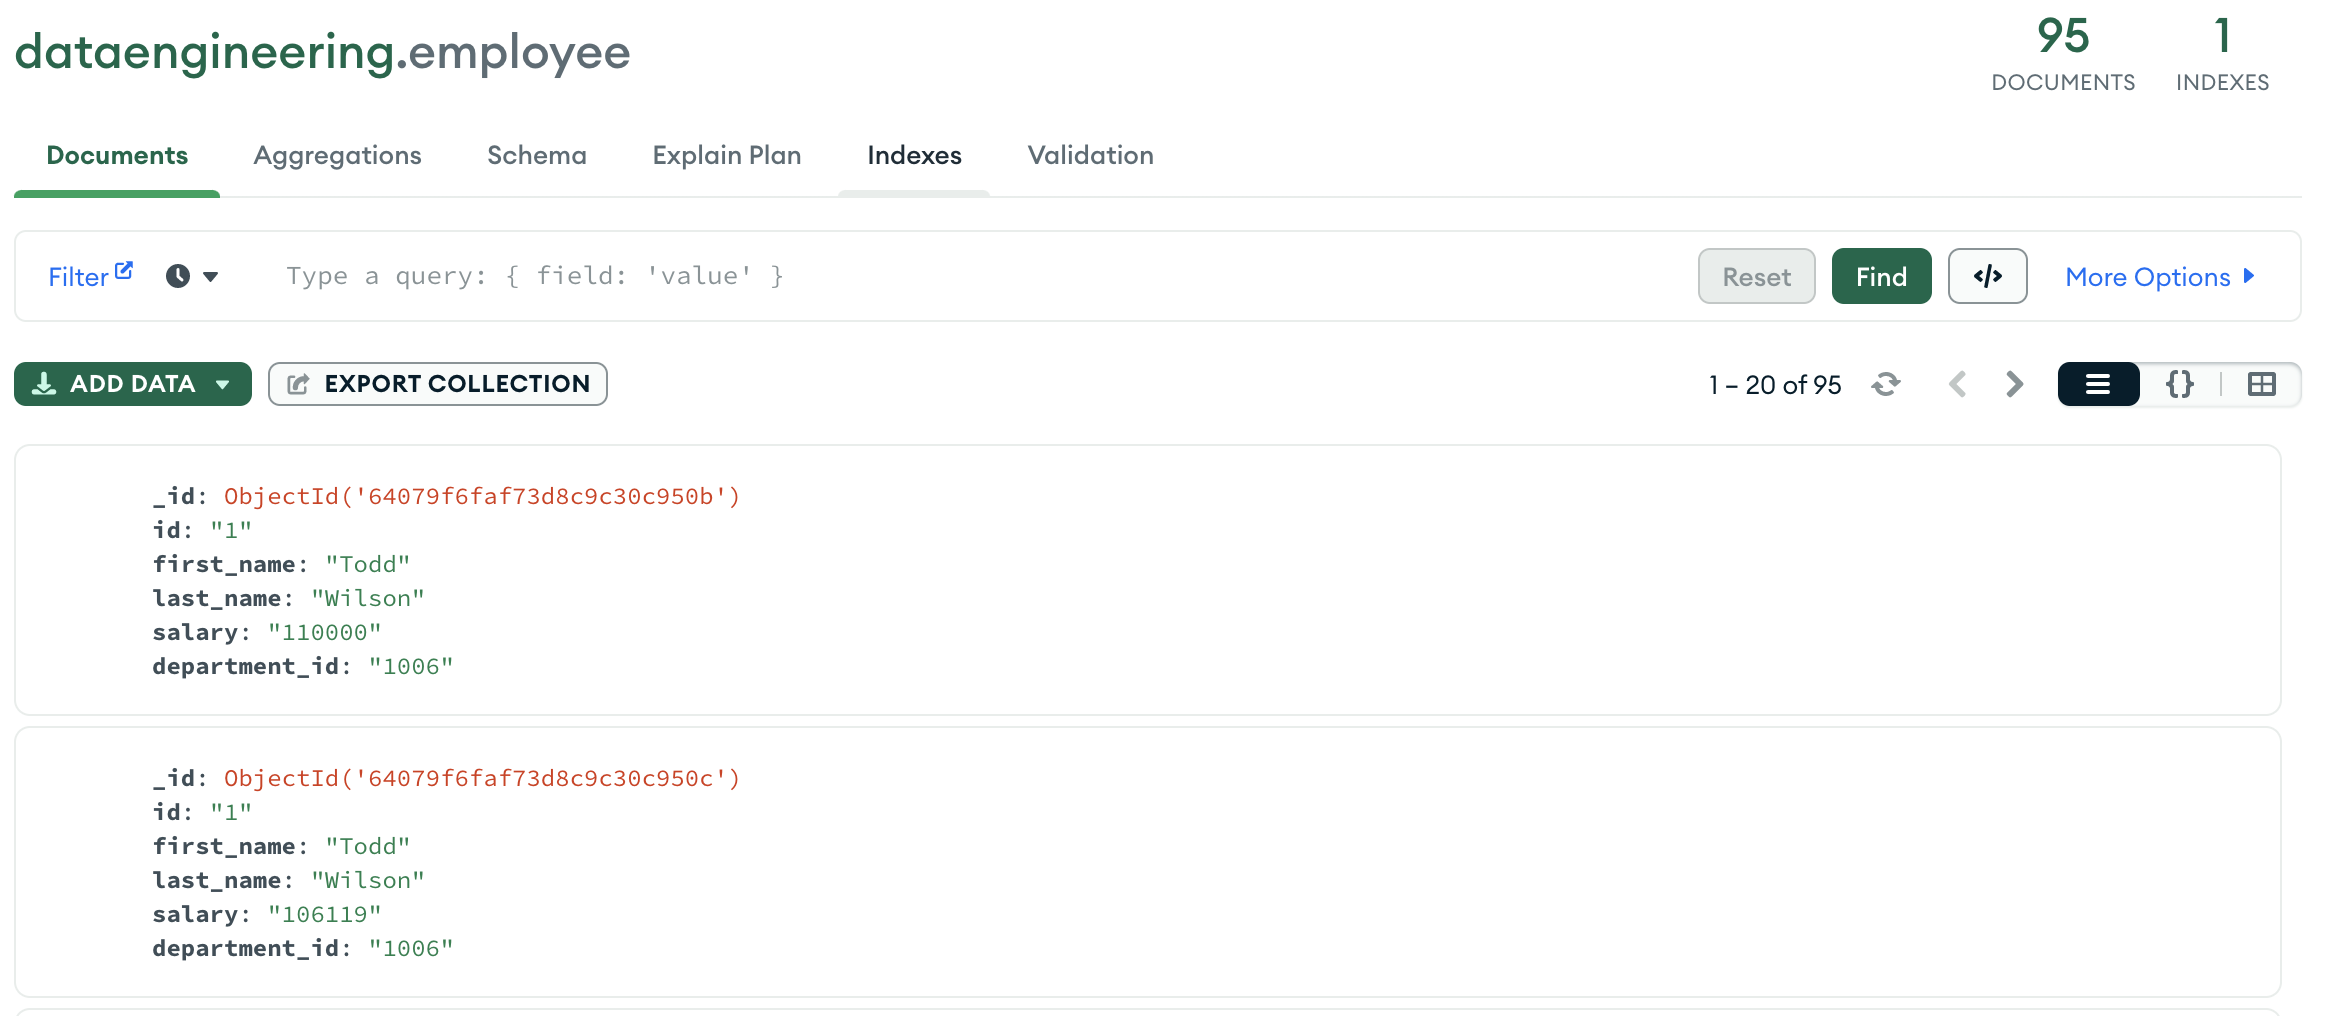
Once you click on import, we will have data available in MongoDB.
Install required spark libraries
As we discussed earlier, with starting Spark session, we will also specify required MongoDB package. So, it will download and install MongoDB packages with starting Spark session.
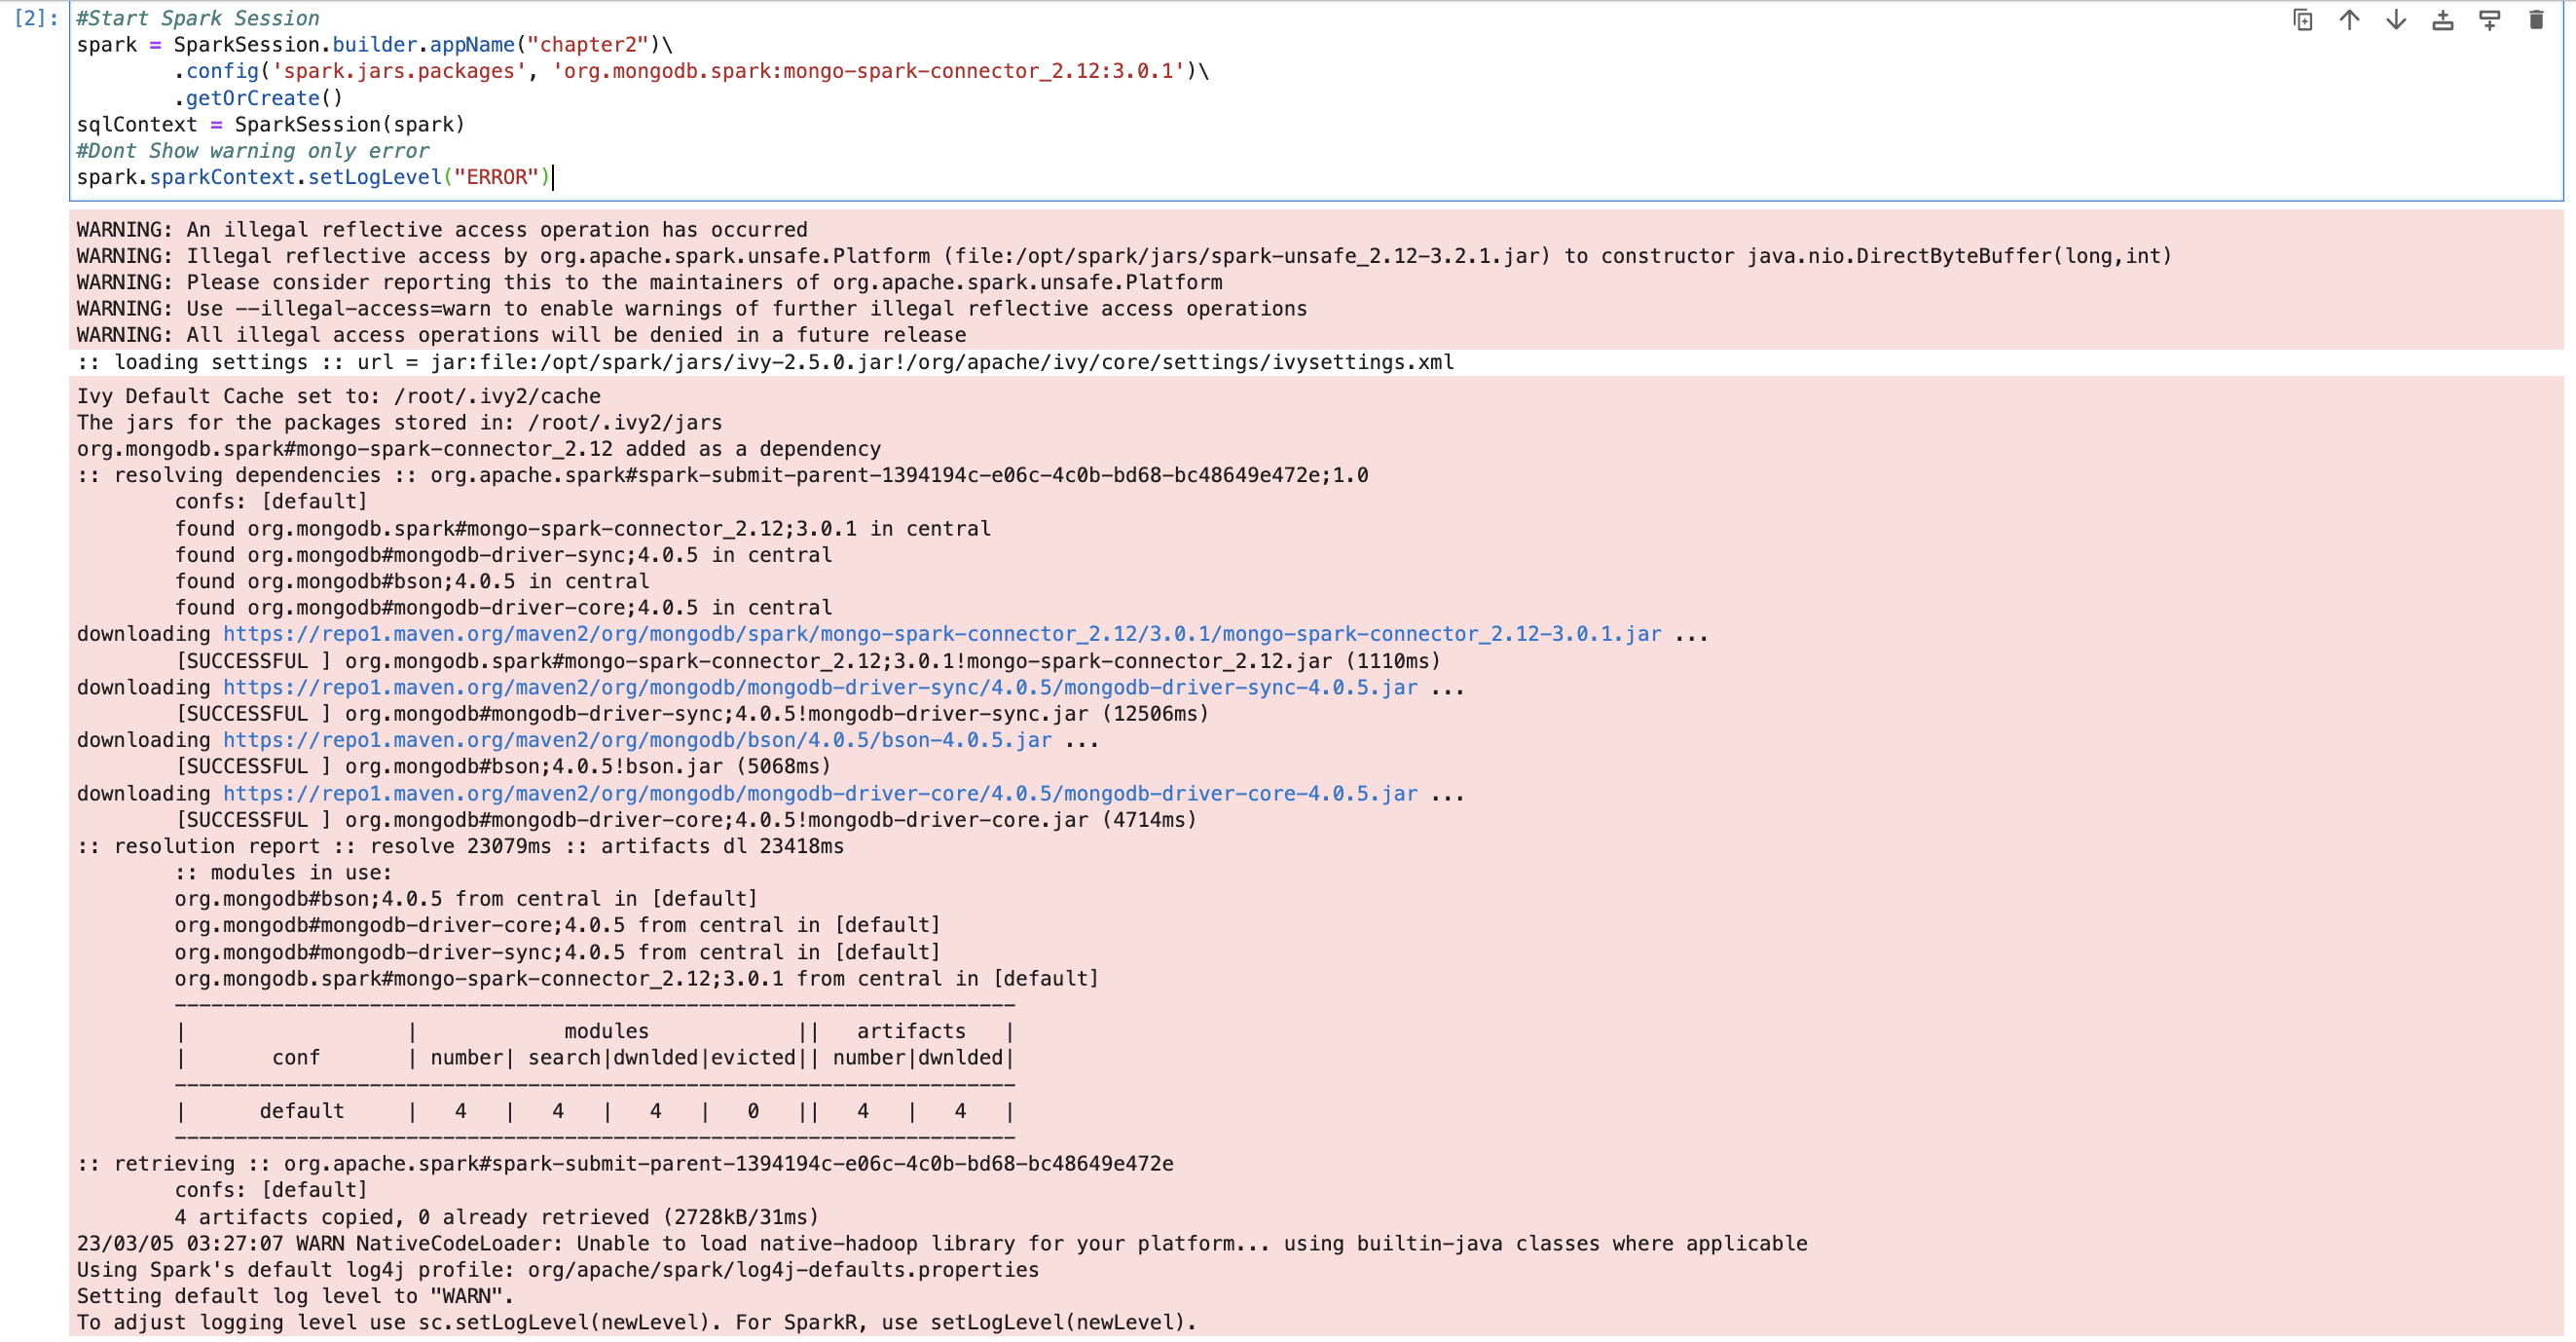
So, we now have all the required packages that are also available with Spark session.
Create connection with MongoDB & Read data
We will use the code below for creating connection with MongoDB and read data from collection.
mongodf = spark.read.format("mongo") \
    .option("uri", "mongodb://root:mongodb@192.168.1.104:27017/") \
    .option("database", "dataengineering") \
    .option("collection", "employee") \
    .load()
Here in “uri”, we have passed connection string. Which is same we passed to login from Mongo Compass. Second step is to print schema and check data in dataframe.
mongodf.printSchema()
mongodf.show(n=10)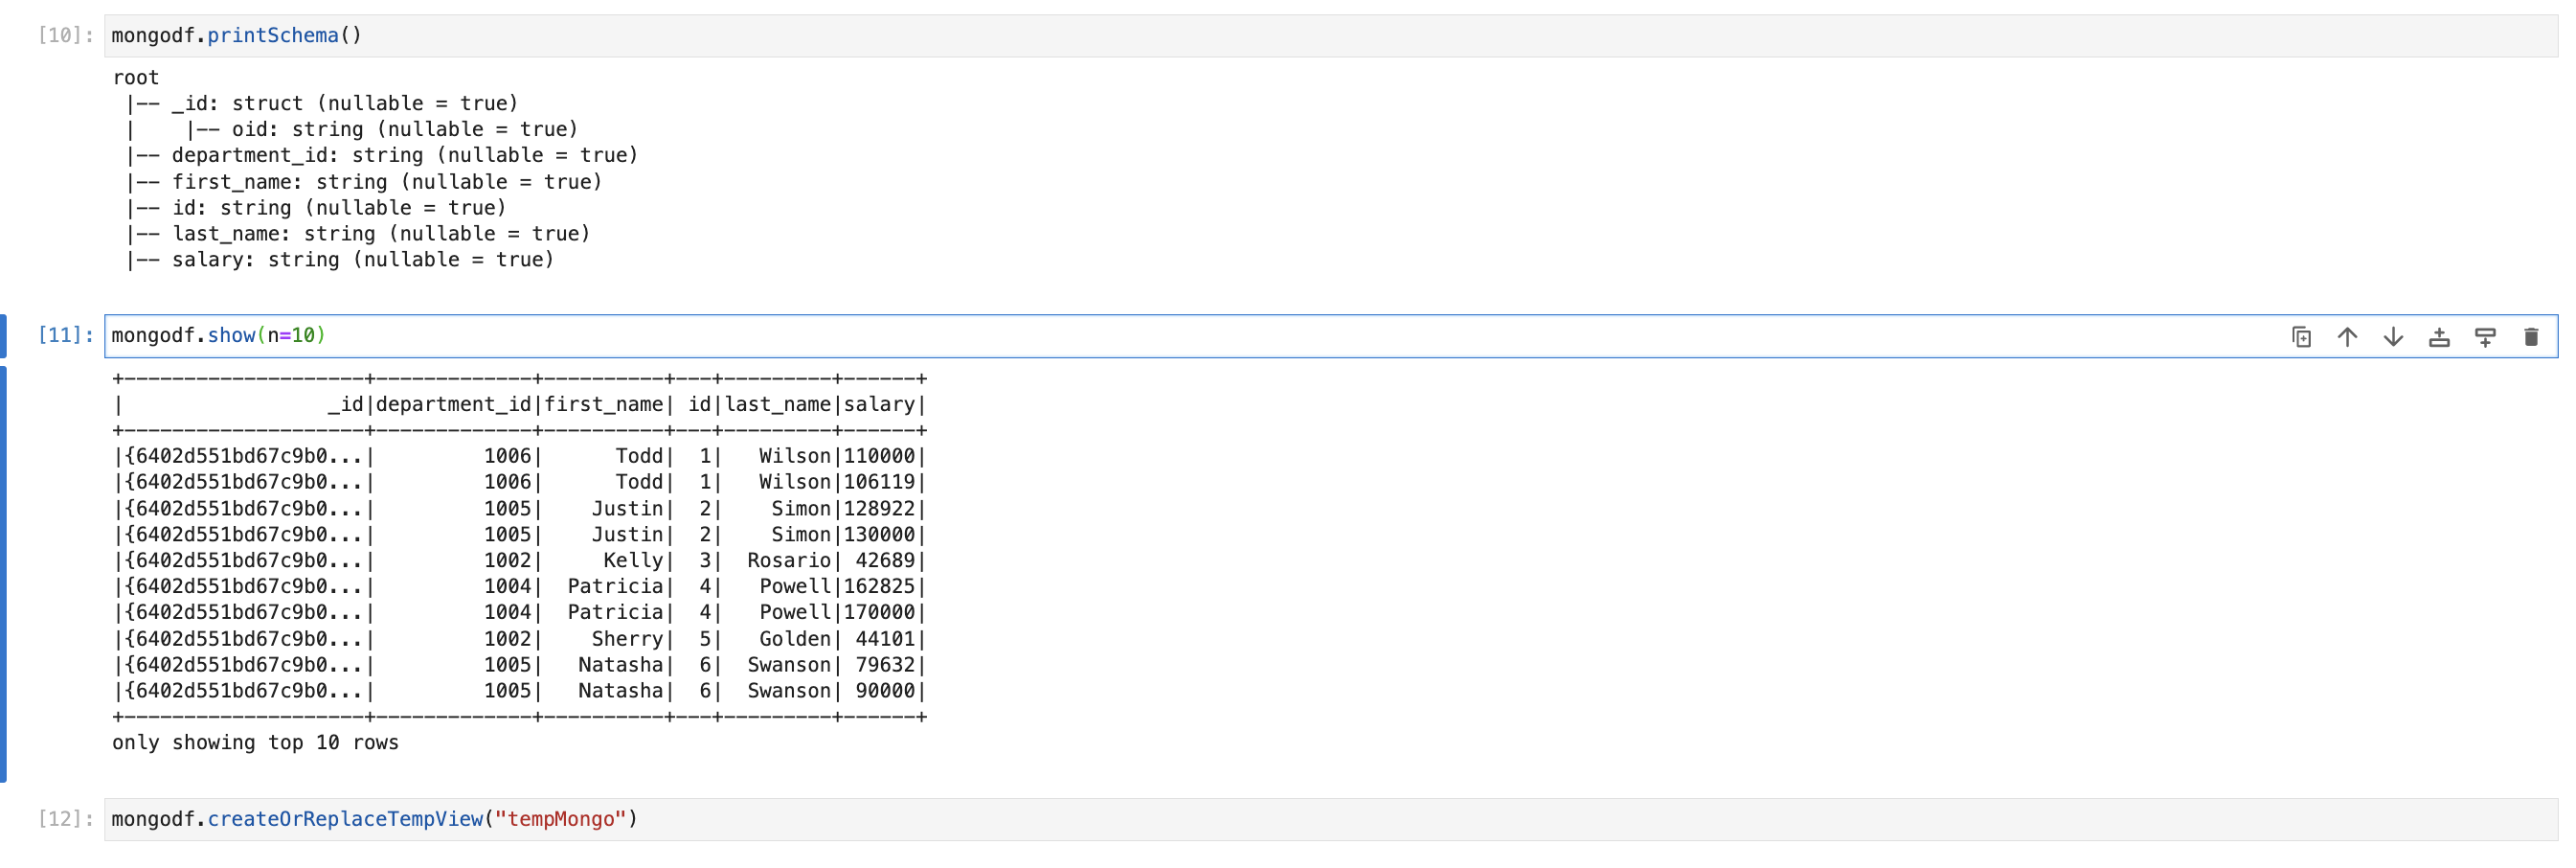
Transform data
First we, will create HIVE view (or table) so we can write Spark SQL.
mongodf.createOrReplaceTempView("tempMongo")Also check data by writing select query
sqlContext.sql("SELECT * FROM tempMongo").show(n=5)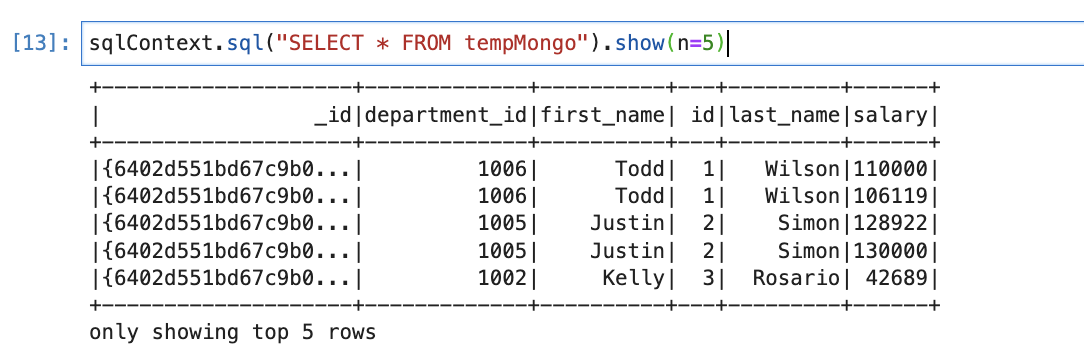
We will filter employees who is having salary more than 50000 and we only need their first name and salary. So, our query will be as below.
newdf = sqlContext.sql("SELECT first_name,salary FROM tempMongo WHERE salary > 50000")
Write data to MongoDB
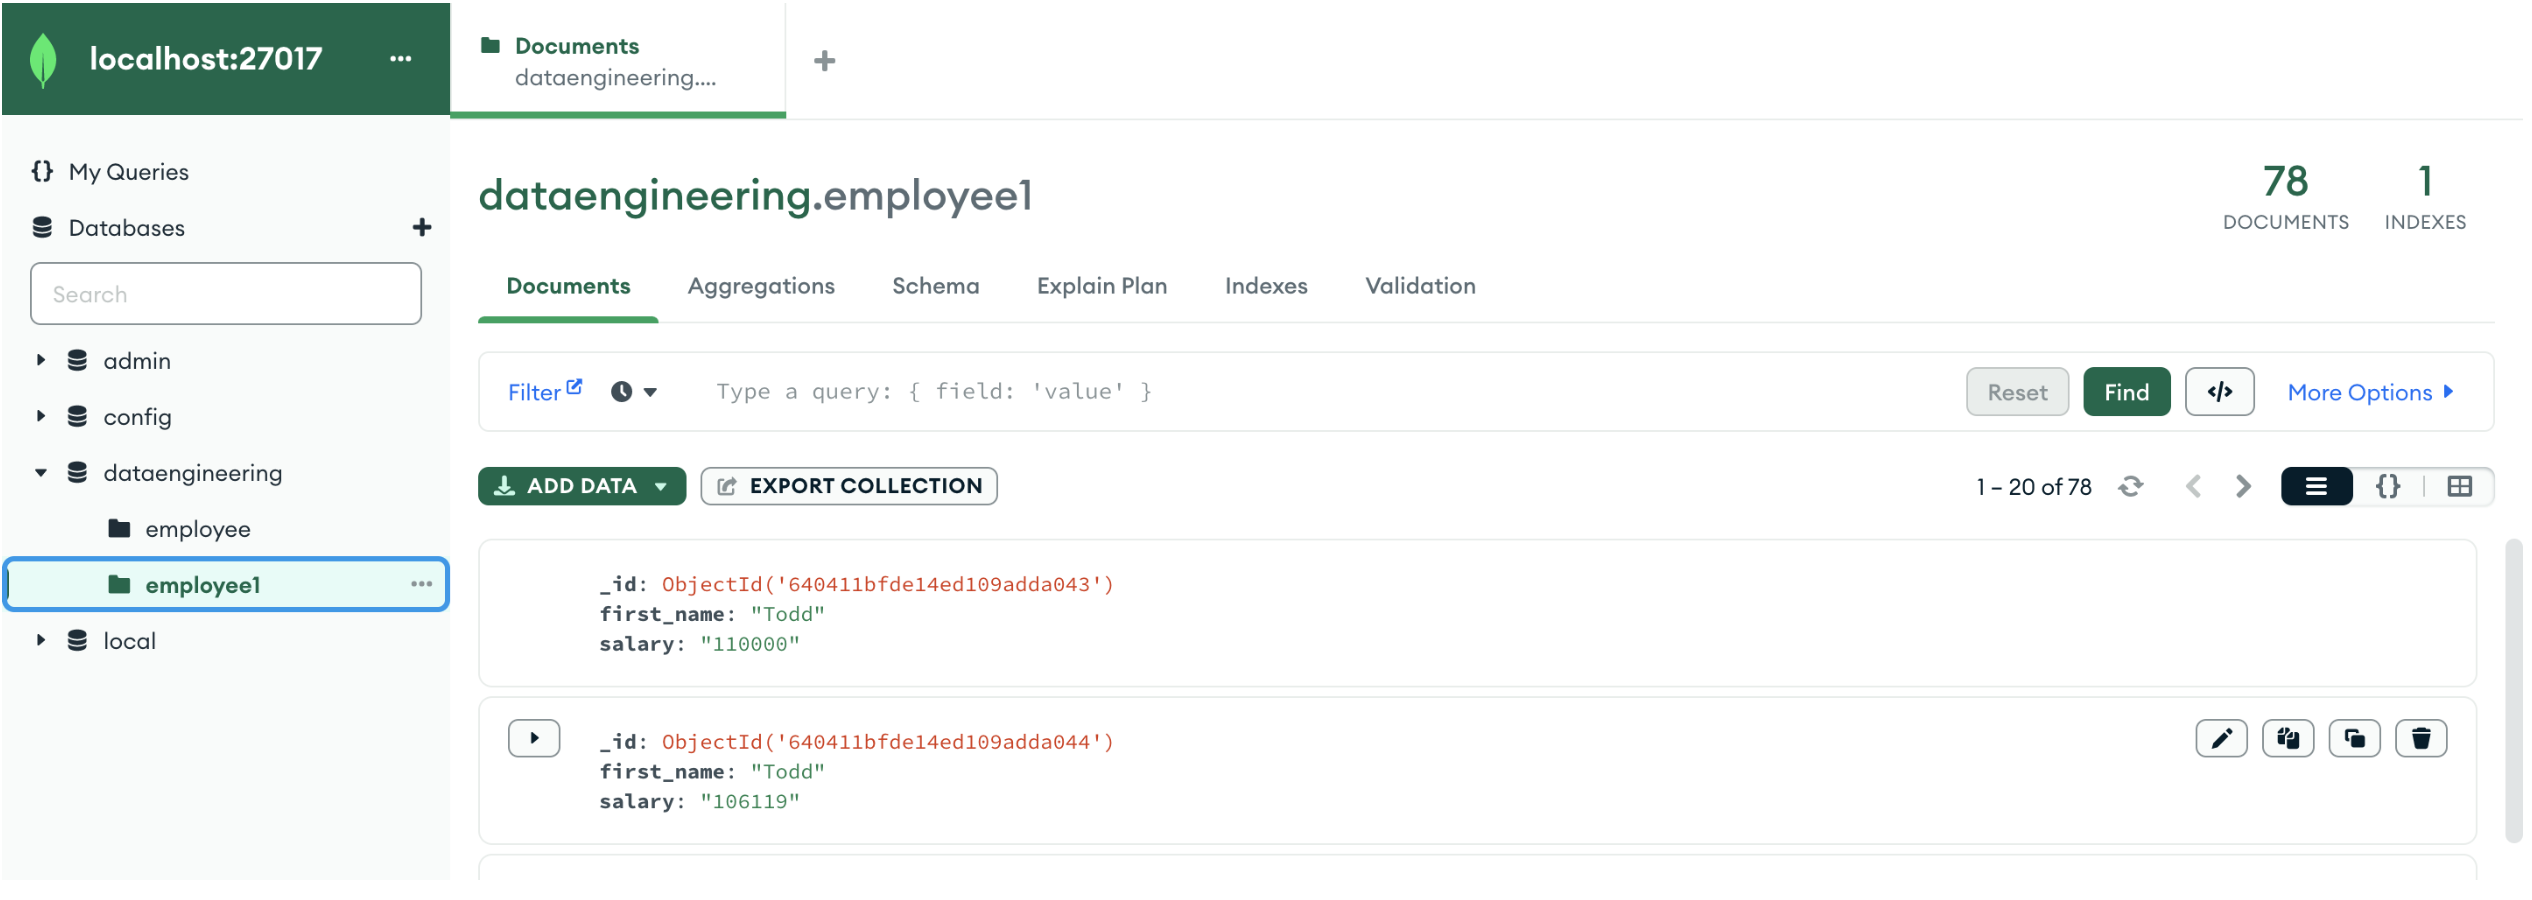
Now, we will load the same (employees with more than 50K) data into MongoDB. For that we will use the code below.
newdf.write.format("mongo") \
    .option("uri", "mongodb://root:mongodb@192.168.1.104:27017/") \
    .option("database", "dataengineering") \
    .option("collection", "employee1") \
   .mode("append").save()
This will check if ’employee1′ collection is there in MongoDB or not. If it is there, it will just load data. If not it will create collection and load data.
Same way, we can use same dataframe and load data into MySQL or PostgreSQL or into any file formats (CSV, Parquet, JSON, ORC, AVRO, etc.) Please check earlier blog on how to load data into SQL or files if you don’t know.
Conclusion:
Here we learned
- How to create connection with MongoDB from Spark
- How to read data from collection from Spark -> Spark.read
- How to load data into collection from Spark -> dataframe.write
